Tutorial Exercise 2.2
Exercise Information
A passenger train, with the capacity to transport 40 people, travels through a simple railway. In the map, the train goes from point A, where it collects passengers, through point B for a quick stop, all the way to point C, where the passengers are left. Passengers wait at the Station in point A, and leave in a line after the Station in point C. Four trains go through the path each day, in intervals of 3 hours. They start their schedule at 6 a.m. and finish it at 6 p.m.
Step 1Creating objects
In order to achieve the solution for the problem, you should create the following objects:
- Create one SourceTrain.
- Create two Rails.
- Connect SourceTrain to the Rail1 (using the A key) and then connect Rail1 to Rail2 via proximity.
- Create one RailControlPoint and put it on Rail2. The RailControlPoints should change color if they are connected correctly to the Rails. We recommend the creation of the RailControlPoints in a empty space and, after that, you can place it on the Rails.
- Create a Station using the Passenger Station model and connect the central port to the RailControlPoint (using the S key).
- On the Station, set "Max Weight" to 40, "Units Per FlowItem" to 1 and "FlowItem Class" to Man.
- Create one Queue and connect it to the Station (using the A key).
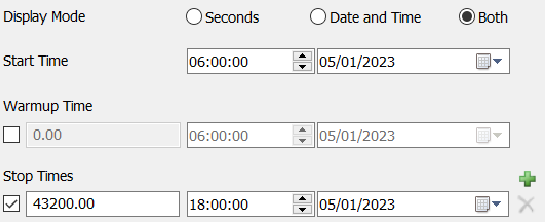
- Create one Source and connect it to the Queue (using the A key), set its to "Inter-Arrivaltime" and create 40 items at time 0, set the "FlowItem Class" to Man. At an interval of 10800 seconds between arrivals.
- Create the GISMap, and create three points in it using the GisMap library. Connect the three points to form the path, select the type of road to Railways.
- Create a GISportal and connect it to the initial point in GISMap (using the A key).
- Create another GISPortal and connect it to point B in GISMap (using the A key). Connect the GISPortal1 to GISPortal2 as well.
- Create two more Rails.
- Connect the GISPortal2 to the first Rail of the second path (using the A key) and then connect Rail3 to Rail4 via proximity.
- Create one more RailControlPoint and put one on Rail4. Create another Station using the Passenger Station model and connect the central port to the RailControlPoint (using the S key).
- Repeat the steps of creating the GISPortal3 and GISPortal4, connecting them to points B and C, then creating another two Rails and connecting GISPortal4 to it. It is important to connect the GISPortal3 and GISPortal4 amongst each other as well.
- Repeat the steps of creating a Passegenger Station and a RailControlPoint to Rail6 and connecting them through a central port.
- Create a Sink and position it at the end of Rail6.
- Finally, create a Queue and connect the Station to it, set it to stack flowitems in a horizontal line.
- Create a Processor and a Sink, set the process time to 5 seconds. Lastly, connect the Queue to the Processor, and the Processor to the Sink.
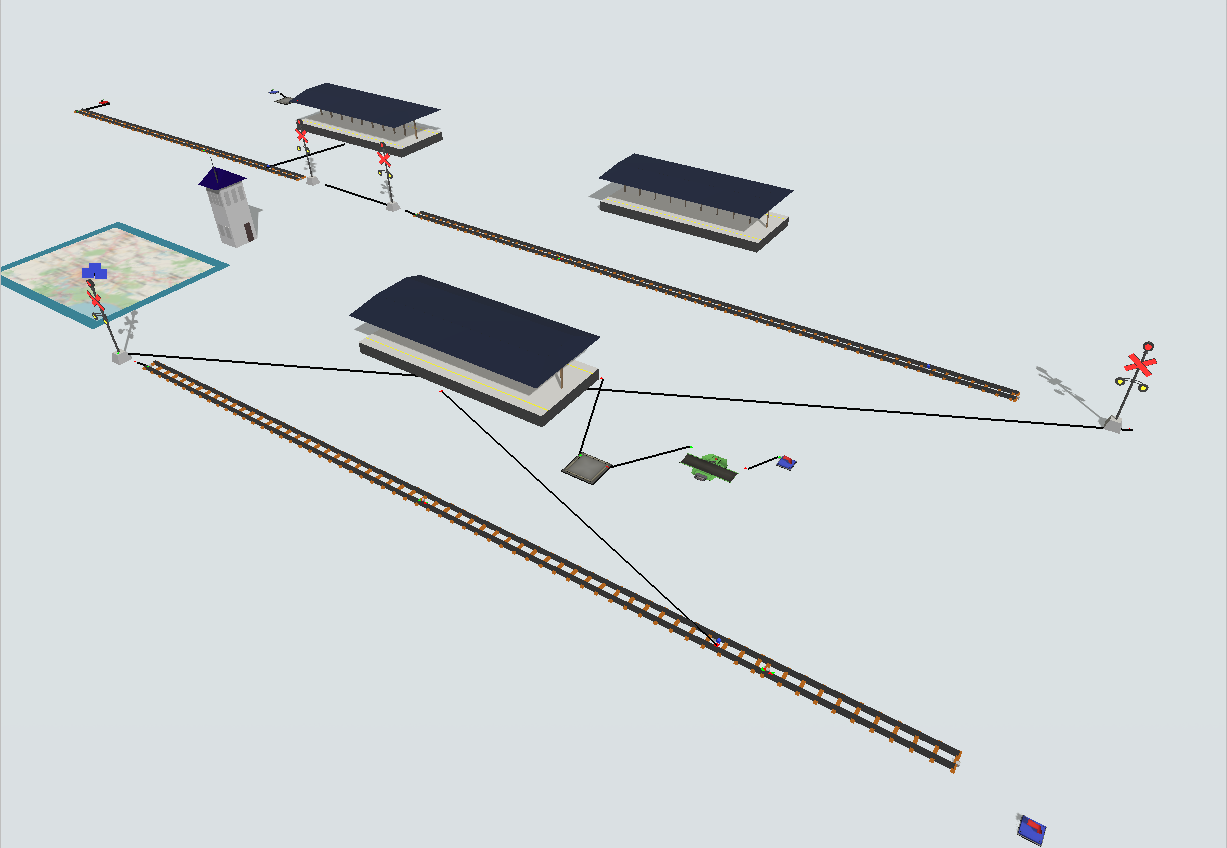
Your model should be looking like this:
Step 2Processflow Configuration
In order to achieve the solution for the problem, you should create the following processflow tasks:
- Create an Inter-Arrival Source.
- Create a "CreateTrain" activity.
- Create a "MoveTrain" activity.
- Create a "LoadWagon" activity.
- Create a "SendToPortal" activity.
- Create a "MoveTrain" activity.
- Create a "SendToPortal" activity.
- Create a "MoveTrain" activity.
- Create an "UnloadWagon" activity.
- Create a "DestroyTrain" activity.
- Create a Sink.
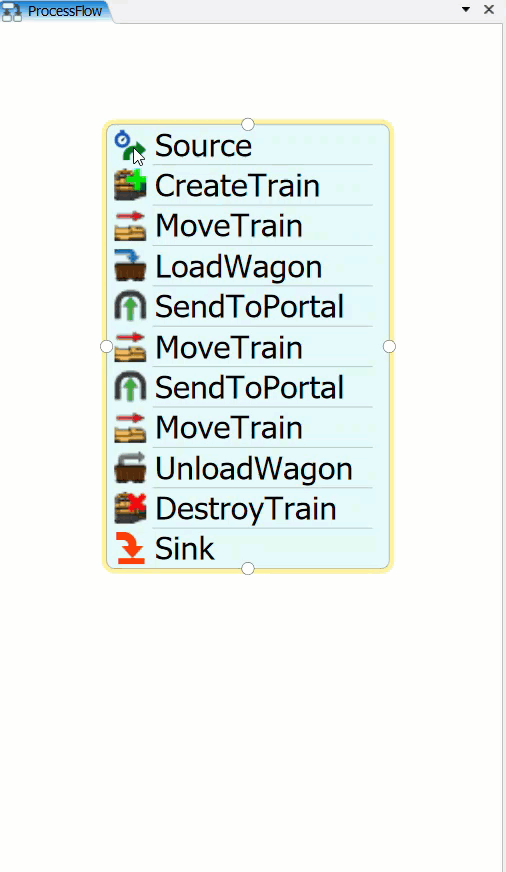
Your processflow should be looking like this:
To configure your processflow tasks follow the steps:
- On source, set the "Inter-Arrivaltime" to 10800.
- On "CreateTrain" activity, point the "Source Train" reference to your SourceTrain. Set "Max Weight" to 40 and the "Locomotive Type" to Passenger.
- On "MoveTrain" activity, set train reference to "token.train" and destiny to the RailControlPoint on Rail2.
- On "LoadWagon" activity, set train reference to "token.train", "Control Point" reference to the RailControlPoint on Rail3 and "Load Type" to a "Load Time Constraint" of 60 seconds.
- On "SendToPortal" activity, set the portal reference to the GISPortal1.
- On the second "MoveTrain" activity, set train reference to "token.train" and destiny to the RailControlPoint on Rail4.
- On the second "SendToPortal" activity, set the portal reference to the GISPortal3.
- On the third "MoveTrain" activity, set train reference to "token.train" and destiny to the RailControlPoint on Rail6.
- On "UnloadWagon" activity, set train reference to "token.train" and "Control Point" reference to the RailControlPoint on Rail6.
- On "DestroyTrain" activity, set train reference to "token.train" and "Sink" reference to the Sink next to Rail6.
With this configuration your model is ready.